Setup Director Kit
The BeamXR Director Kit is a suite of tools designed to get you up and running with some of the more complex features and functionality we provide. It streamlines the entire user and developer journey by including in-game elements and helpful extra tools to make both yourself and your players' streaming experience all the better.
It currently consists of:
- User Control Panel
- Hand Menu
- In-game Camera Model
- Utility Scripts
- Example Assets
With more features being added in future versions.
Our Director Kit is built using Unity's XR Interaction Kit 3.0 and the Meta All-In-One SDK, but most of the interactions rely on canvas UI elements meaning it can be easily ported to other interaction systems.
These features are optional but highly recommended as they save you time, provide beneficial functionality, and will generally improve the experience for yourself as a developer, and your players.
Installing the Package
You can install the Director Kit with one of the following methods
Director Kit Download
Git URL Install
Note that this method requires you to have Git installed on your system
- Open the Unity Package Manager (
Window > Package Manager) - Click the plus in the top left and select
Add package from git URL... - Copy and paste
https://github.com/BeamXR-io/io.beamxr.unity.director.gitinto the URL box, make sure to include.giton the end otherwise it will fail - Press
Addand wait for Unity to import the package
Package From Disk Install
- Download the Director Kit from Github and extract it
- Open the Unity Package Manager (
Window > Package Manager) - Click the plus in the top left and select
Add package from disk... - Locate the BeamXR Director Kit on your drive and click the package.json file
- Press open and wait as Unity imports the package
You can reference the package with a relative path by modifying the manifest.json file within your project's Packages folder.
Embedded Install
Download the Director Kit from Github and simply extract the zip file into the Packages folder of your Unity project.
Unity will automatically find the package and install it as necessary.
Getting Started
We provide two different ways to start using the Director Kit, either by implementing our prefabs, or by using our example scene.
Example Scene Intro
The easiest way to get started is to open up the Director Kit example scene. It includes extra example assets, and ways to use them, that aren't directly included in the package. These are designed to help you get up and running with some of the more complex elements of the package.
This can be found in the Unity Package Manager under BeamXR Director Kit > Samples > Director Full Example.
Make sure to select the correct sample based upon your project's XR SDK (XRI/Meta).
Prefab Intro
You can import each of the parts of the Director Kit to your own scene by going to the BeamXR > Prefabs > Director then add the Control Panel, Hand Menu, and Camera Model to your scene.
Control Panel
The Control Panel is built to be the central hub for everything your player will need when streaming and recording within your game. It guides them through the entire BeamXR experience, and allows them to adjust camera angles and options with relative ease.
XRI's default settings make it harder to directly interact with the Control Panel. We strongly advise changing the Cast Radius of the Sphere Interaction Caster components within your scene to a smaller than default value of around 0.025 from 0.1. These are generally found on the Near-Far Interactor objects within the default XRI XR Origin prefab.
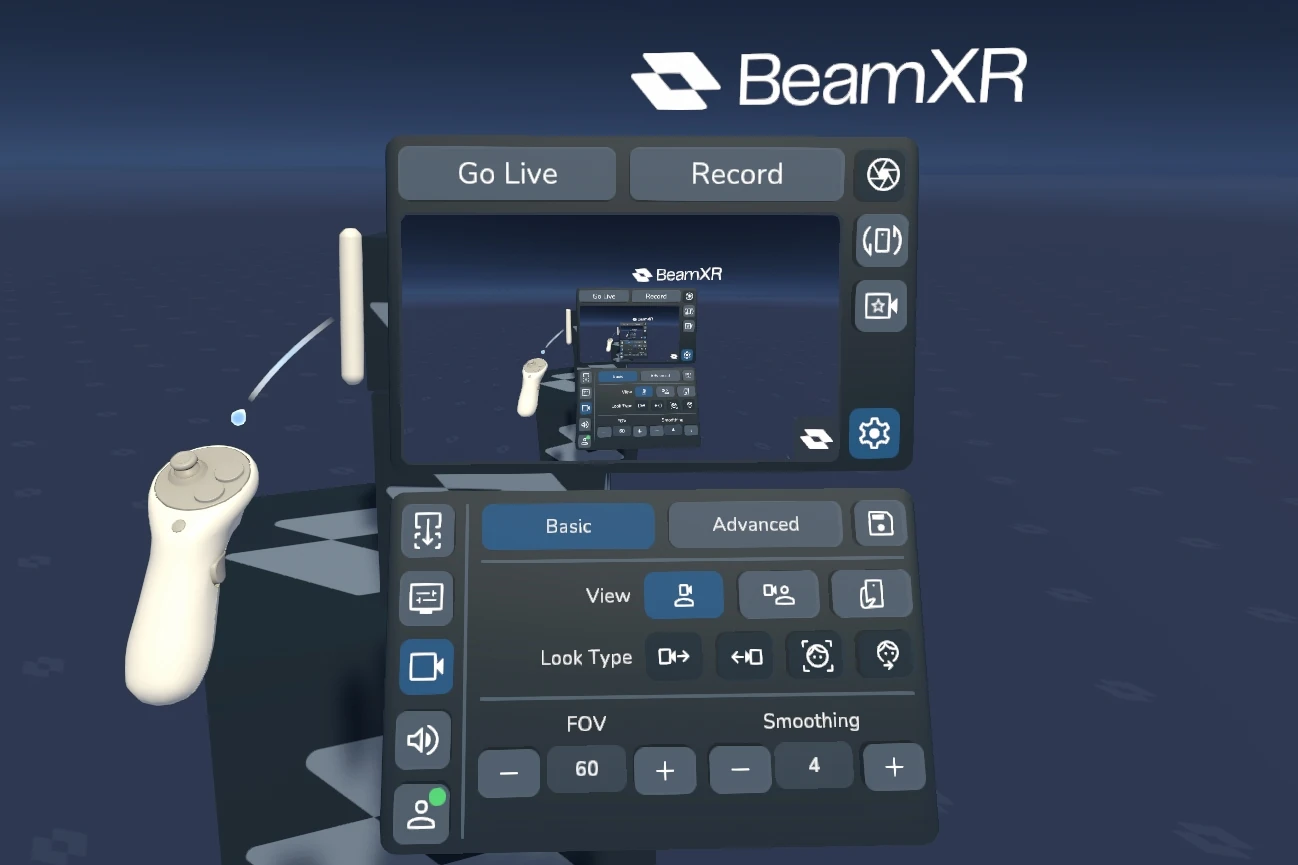
Control Panel Elements
The top of the Control Panel (the core preview panel) houses the live camera preview, statuses, preset selection, session buttons, and photo capturing. It allow the user to quickly see what their stream or recording will be seeing, and the relevant information about its' status. Changing presets allows them to quickly swap between either the developer defined or user saved camera angles and settings.
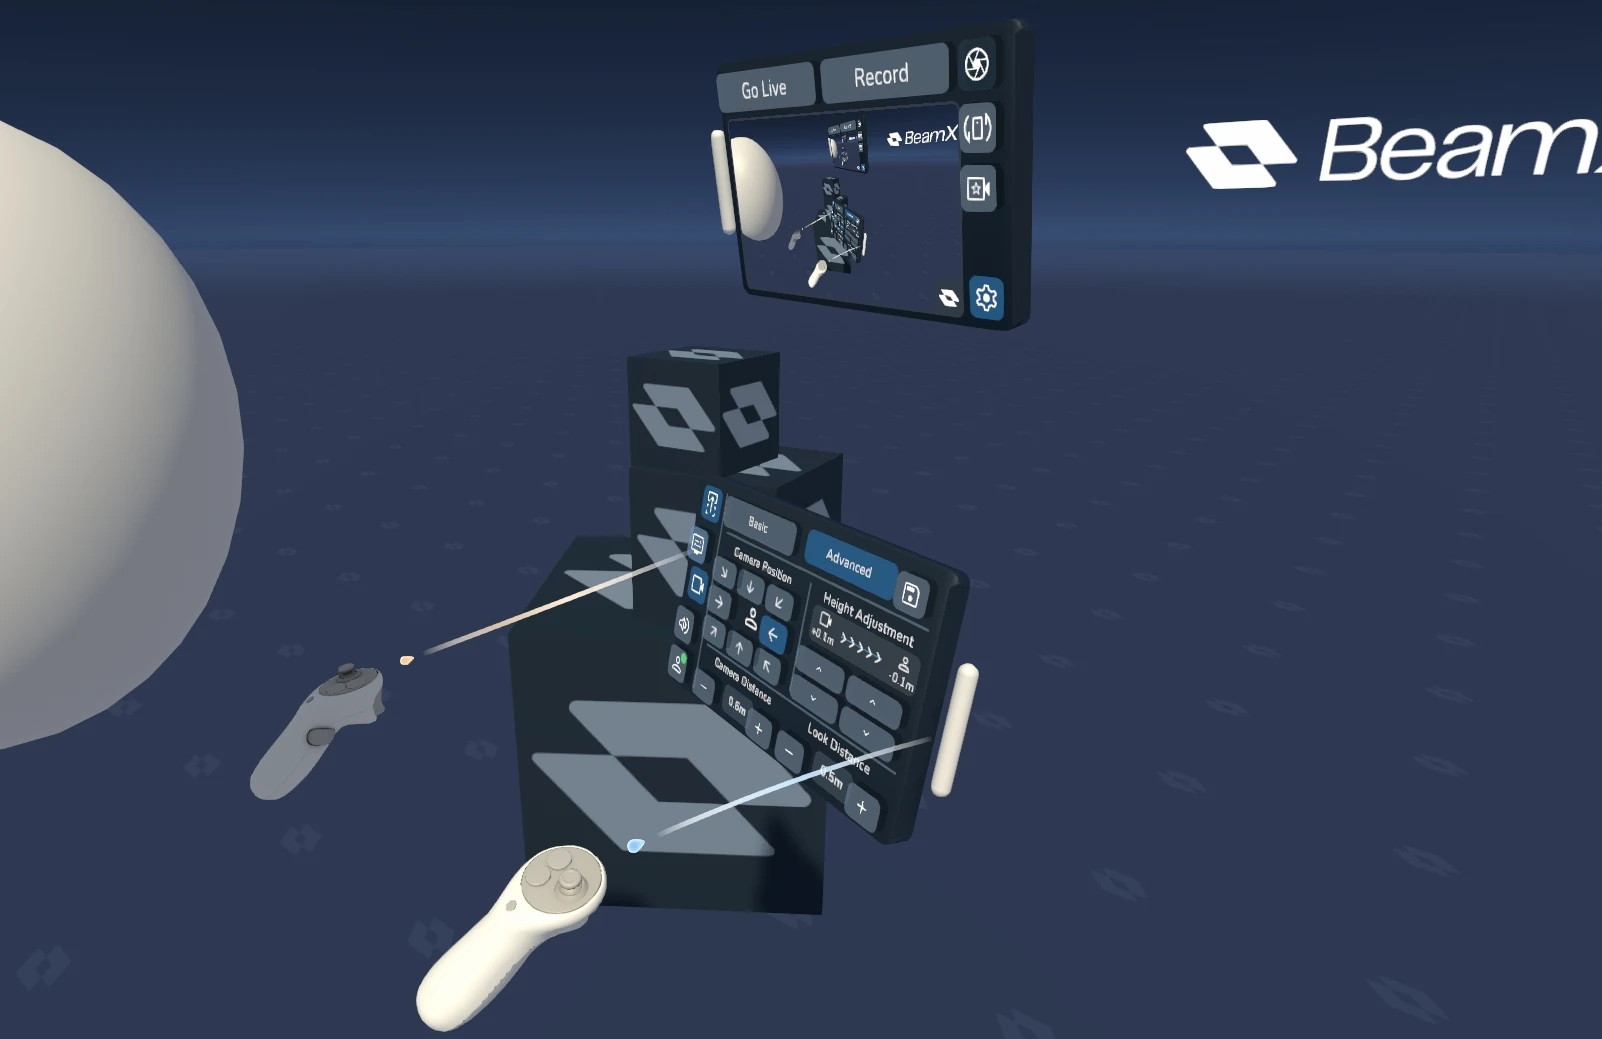
The lower segment of the Control Panel (the settings panel) houses nearly all of the remaining functionality. This includes all the camera adjustments such as field of view, smoothing, camera positioning (such as first or third person), camera direction settings. Capture quality can be changed here, along with audio settings. It's also where the user will link their BeamXR account to your app.
You can move the Control Panel around in your scene using the white bars at the side. The lower settings panel can be undocked from the preview panel at any time.
Camera Presets
The camera presets can be stored and loaded as desired by the player. They initially respect the camera presets that you as a developer assign, but can be overridden by the player in game. The default camera preset will always be available to the user, make sure to set up one that showcases your game the best.
For a more detailed overview and explanation of the Camera Settings, Camera Presets, and other camera features, please refer to the Beam Camera and Camera Settings and Presets pages.
Hand Menu
Please note that the Hand Menu is currently limited in functionality and will be significantly expanded in future releases
The Hand Menu provides easy access to the Control Panel. It simply opens and closes the Control Panel, bringing it back to the user as needed.
You will need to assign your controller/hand transforms. These can be adjusted and tested at runtime to find the best orientation for your setup. You will generally find that the hand you specify will require the opposite direction to work correctly (e.g. the left controller works with the right direction option).
Camera Model

The Camera Model is a in-game model that helps visualise where the camera physically resides within your scene. It will follow wherever the Beam Camera is, while also showing information of the streaming and recording statuses. It is only ever visible when using the third person view. Do note that unless the smoothing values are set relatively high, it is unlikely that the user will ever actually see the camera, especially if it's set to behind them.
Setup Complete!
All the items listed here should automagically attach to everything BeamXR related in your project without issues. You're now all setup with BeamXR from both a developer and player standpoint. Happy streaming!